
Every property and Starlink project is different. This guide explains the practical factors considered during professional installation and helps you prepare informed questions before work begins.
Treat 150 feet as the supported ceiling
For the Standard rectangular system, Starlink has offered a 150-foot replacement cable for installations that need more distance between the terminal and router. That full-length cable should be treated as the supported maximum—not the beginning of a longer run assembled with extensions or couplers.
Cable limits vary by Starlink model and generation. Mini and Performance systems use different power, connector, and cable arrangements, so their current specifications should be checked separately. Never assume that a cable or extension approved for one kit is approved for another.
Why excessive length creates problems
The dish cable carries both high-speed data and electrical power. As a powered cable becomes longer, resistance and voltage drop increase. Additional connectors also introduce possible failure points, especially outdoors where moisture and contamination can reach them.
An overlength run may cause intermittent restarts, cable alerts, reduced stability, or complete loss of connection. Coiling excess cable tightly or forcing sharp bends can create heat, stress, and damage even when the measured length is within the limit.
Do not treat the cable as direct-burial wire
A ground-pole installation often requires the cable to cross a yard before entering the building. The exposed Starlink cable should not simply be placed in a shallow trench. Soil stays wet, shifts, freezes, and contains rocks, insects, lawn tools, and chemicals that can damage the jacket over time.
Use appropriately sized exterior-rated conduit for the underground portion. Conduit provides a replaceable pathway and protects the cable from moisture exposure, crushing, shovels, animals, and landscaping equipment. Depth, conduit type, bends, and separation from electrical wiring must follow local requirements.
Need help with this on your Starlink system?
Mann's Starlink Contracting provides owner-installed service throughout Kentucky and an 11-state region.
Design the conduit for replacement
Use wide sweeps instead of sharp elbows and size the conduit generously enough for the factory connector to pass without being forced. A pull string makes future replacement easier. Seal the building entry correctly while avoiding a fully trapped pathway where condensation has no place to drain.
The cable should enter and leave the conduit without rubbing against a sharp edge. Bushings, strain relief, supported vertical sections, and a drip loop help protect the jacket and keep water away from the wall opening.
Keep cable off roof shingles
Draping cable loosely across asphalt shingles exposes it to intense roof heat, direct ultraviolet light, standing moisture, ice, and abrasion caused by wind movement. Over time the jacket can fade, harden, crack, or become brittle. A loose cable can also rub against granules and roof edges every time it moves.
Route near a protected roof edge when possible and secure the cable with compatible exterior clips at sensible intervals. Do not staple through the cable, pinch it beneath flashing, or place clips so tightly that they deform the jacket.
Inspect the entire outdoor route
Check exposed cable periodically for discoloration, cracking, flattened areas, animal damage, loose clips, corrosion at connectors, and water intrusion. Pay particular attention after roof work, landscaping, severe storms, or freezing conditions.
Good cable routing is part of the installation—not a finishing detail. Staying within the kit's supported length and protecting every outdoor section helps preserve power delivery, network performance, and future serviceability.
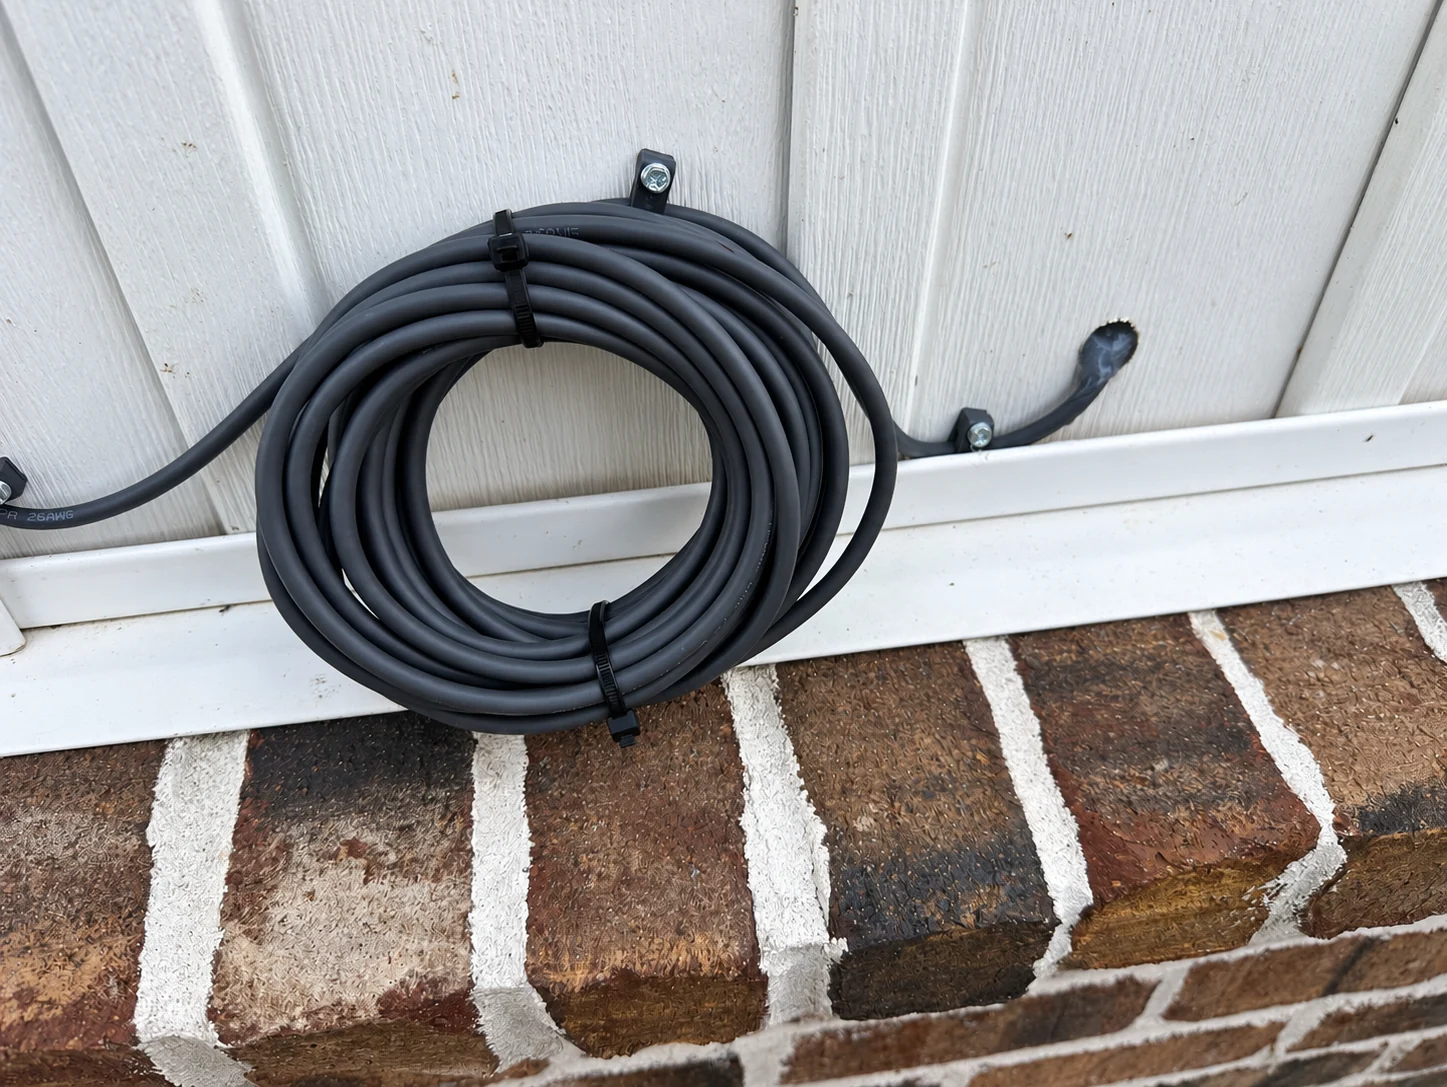
This field example shows spare cable gathered beside the outside entry. Keep useful service allowance without tight bends or strain at the connection.
Installation and photo: Mann's Starlink ContractingGet a personal installation estimate.
Send your location and project details. Caleb will discuss your equipment and mounting needs, then confirm your complete quote before scheduling.
Questions first? Call Caleb directly at 270-940-4866.
Written byCaleb MannOwner and installer at Mann's Starlink Contracting. Caleb works directly with customers from project planning through final system setup.
