
Every property and Starlink project is different. This guide explains the practical factors considered during professional installation and helps you prepare informed questions before work begins.
RV cable routes must survive movement
RV cable routing must survive movement, vibration, weather, storage, and frequent setup while preserving the factory connector. The easiest temporary opening is rarely the best permanent route.
Road vibration repeatedly flexes unsupported cable and loosens fittings. Wind can whip exterior loops, while storage doors and leveling movement pinch routes that looked safe when parked. Permanent routing needs more support and clearance than a temporary campsite setup.
Choose the router and entry location together
Inspect roof construction, existing utility chases, cabinets, slide-outs, awnings, air conditioners, hot surfaces, moving hinges, interior router location, and service loops needed for maintenance.
Place the router where Wi-Fi reaches sleeping and work areas and where power is available without blocking cabinets. Then select a roof or wall entry that can reach it with gentle bends. The shortest exterior path may finish inside a shower, appliance cavity, or inaccessible ceiling space.
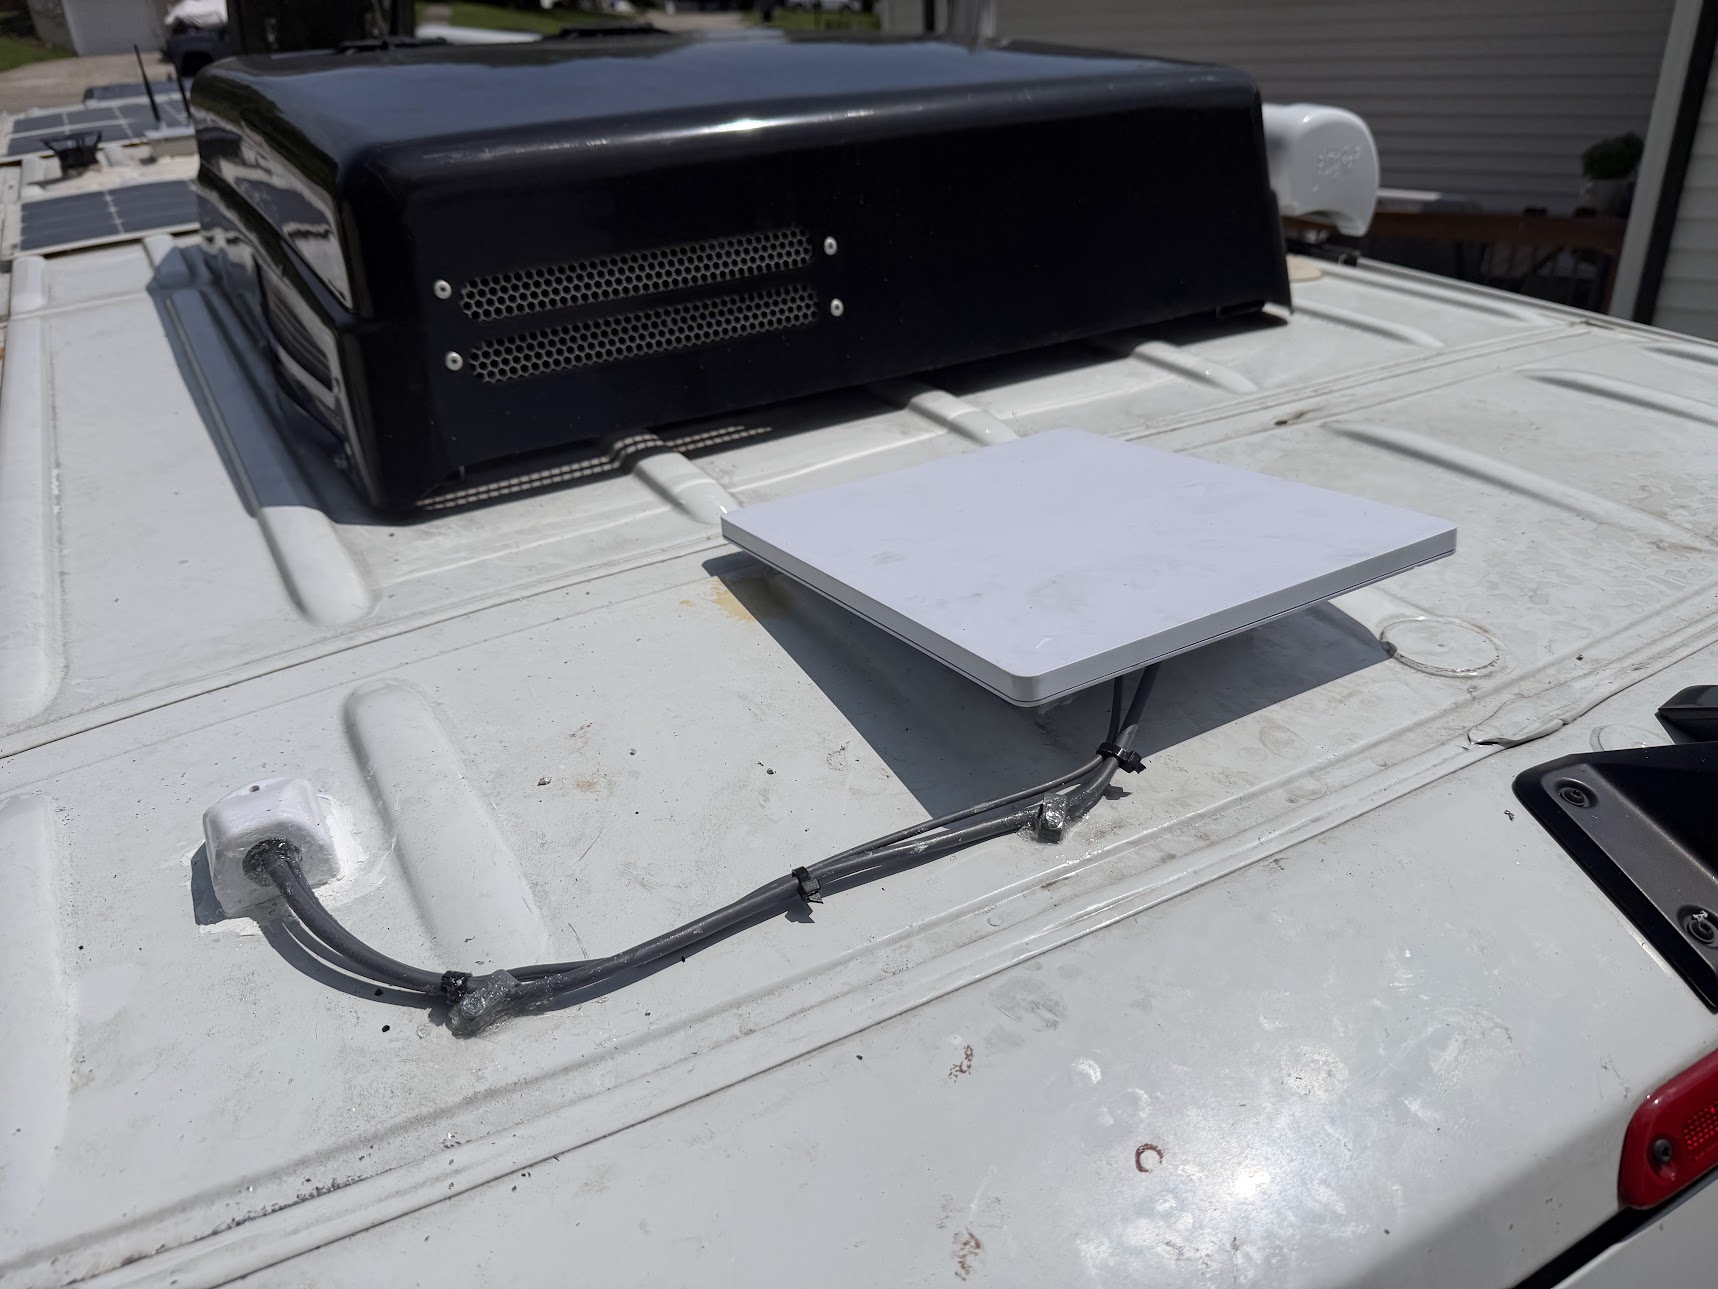
The Mini has a fixed roof position with the cable secured toward an entry fitting. This is a mounting example; a roof installation alone does not establish approval for use in motion.
Installation and photo: Mann's Starlink Contracting · View full photo ↗Need help with this on your Starlink system?
Mann's Starlink Contracting provides owner-installed service throughout Kentucky and an 11-state region.
Use existing chases carefully
Use compatible weatherproof entry hardware, smooth protected openings, secure supports that do not crush the cable, gentle bends, and a route separated from mechanical movement and excessive heat.
Refrigerator vents, plumbing bays, and wiring chases sometimes provide access, but they may contain heat, moving parts, combustible clearances, or tight bends. Inspect both ends and confirm the factory connector fits before drilling. Never interfere with appliance ventilation or required fire separation.
Avoid slide-outs, heat, and sharp edges
Avoid routing through a slide seal, closing a window on the cable, laying it across a sharp roof edge, or leaving loose cable where wind can whip it. Do not drill until hidden wiring and plumbing have been considered.
Maintain clearance from slide mechanisms, awning hardware, hinges, exhaust, furnace ducts, and metal framing. Protect every opening with a smooth gland or grommet and seal the exterior for roof movement. Leave controlled service slack, not a loose coil that can rub during travel.
Inspect the route after travel
Choose the router location and full route before making the exterior opening. Inspect the cable after travel and address chafing or loosened supports before conductor damage develops.
After the first trips and seasonally thereafter, check supports, entry seals, connector seating, abrasion, and roof movement. A faint wear mark is an early warning. Correct the support or clearance before vibration reaches the conductors.
Get a personal installation estimate.
Send your location and project details. Caleb will discuss your equipment and mounting needs, then confirm your complete quote before scheduling.
Questions first? Call Caleb directly at 270-940-4866.
Written byCaleb MannOwner and installer at Mann's Starlink Contracting. Caleb works directly with customers from project planning through final system setup.

