
Every property and Starlink project is different. This guide explains the practical factors considered during professional installation and helps you prepare informed questions before work begins.
Make the property safe before restoring internet
After wind, hail, falling limbs, or roof damage, the priority is making the structure safe. A Starlink dish that still connects may nevertheless have a loosened mount, damaged cable, cracked seal, or compromised roof beneath it.
Downed power, unstable decking, loose limbs, sharp metal, and wet surfaces take priority over connectivity. Do not approach a hanging dish or cable until electrical and structural hazards are cleared. Temporary internet can be arranged later from a safe ground location when appropriate.
Document roof, mount, cable, and app condition
Document the dish, mount, cable, entry point, roof surface, debris, and app symptoms from a safe location. Confirm whether roofing work requires temporary removal and whether the existing mount area will be rebuilt.
Take wide and close photographs from safe positions before cleanup. Save app alerts, outage times, serial information, and invoices. Record whether the mast moved, the bracket pulled away, the cable stretched, or water entered near the penetration. This evidence assists contractors, support, and insurance.
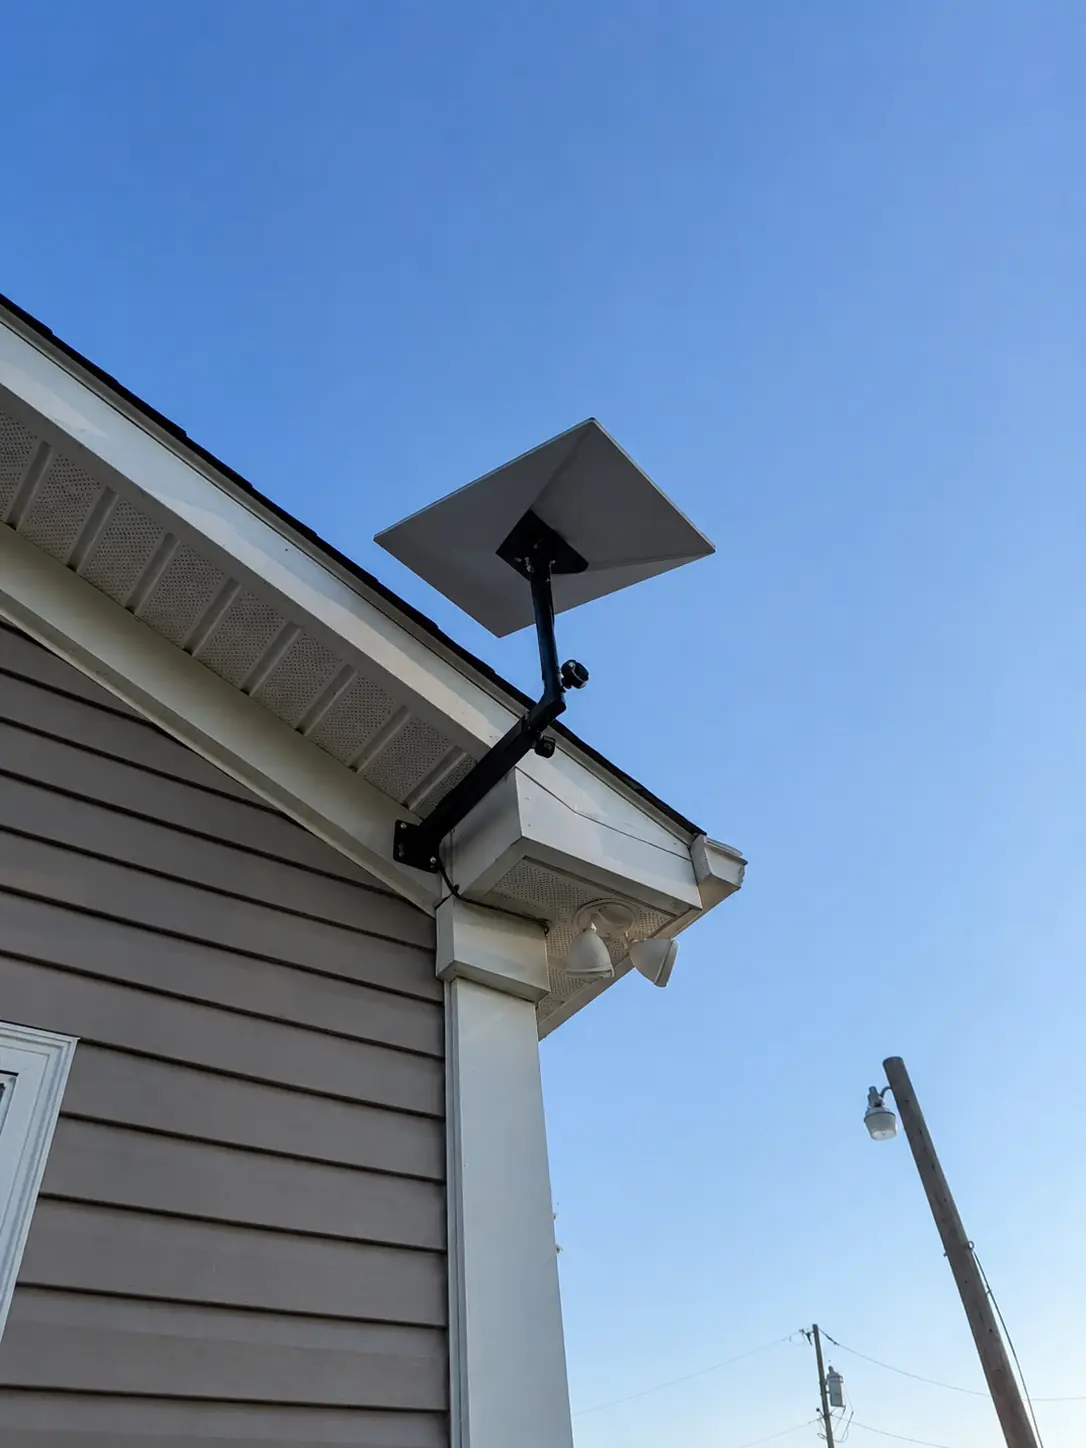
The bracket places the dish above the roof edge while the cable follows the outside of the house. Check the attachment and sky view for the actual property.
Installation and photo: Mann's Starlink Contracting · View full photo ↗Need help with this on your Starlink system?
Mann's Starlink Contracting provides owner-installed service throughout Kentucky and an 11-state region.
Coordinate removal with the roofing contractor
Coordinate the roofer and installer so equipment is removed before destructive work and reinstalled only after the repaired surface is ready. Replace damaged hardware or cable rather than hiding defects beneath new material.
Roofers need unobstructed access and should not leave the dish hanging by its cable or reinstall unfamiliar hardware casually. Schedule proper removal before tear-off. Mark the router end and protect equipment indoors while the roof opening is repaired.
Decide what can be reused
Do not climb onto a storm-damaged roof, allow a dish to hang from its cable, remount into broken decking, or assume old holes can simply be reused. Electrical hazards and unstable structures require qualified emergency help.
A straight mast and undamaged dish may be reusable after inspection, but bent brackets, pulled fasteners, cracked housings, abraded cable, and contaminated connectors should be replaced. Old penetration locations may no longer have sound decking or suit the new roofing system.
Reinstall only after the repair plan is complete
Keep photographs, invoices, equipment serial information, and contractor notes for insurance discussions. Schedule the final Starlink location after the roof repair plan is known, not before.
Wait until roofing materials, warranty requirements, flashing details, and final obstruction view are known. Then choose the mount and route with both installer and roofer input. Seal abandoned openings correctly and test the completed system after the repaired roof is ready.
Get a personal installation estimate.
Send your location and project details. Caleb will discuss your equipment and mounting needs, then confirm your complete quote before scheduling.
Questions first? Call Caleb directly at 270-940-4866.
Written byCaleb MannOwner and installer at Mann's Starlink Contracting. Caleb works directly with customers from project planning through final system setup.

