
Every property and Starlink project is different. This guide explains the practical factors considered during professional installation and helps you prepare informed questions before work begins.
Include Starlink in the roofing scope
Tell the roofer about the dish, mount, exterior cable, wall entry, and interior equipment before signing the project scope. Determine who will remove the system, protect it, repair old penetrations, and authorize reinstallation. A roofing crew should not be forced to improvise around powered communications equipment on installation day.
Document the working installation
Photograph the dish position, mount, cable supports, penetration, router, app status, alignment, and obstruction history before removal. Label the cable and parts. This record helps separate pre-existing equipment problems from roofing damage and gives the installer a reference when evaluating whether the original area remains suitable.
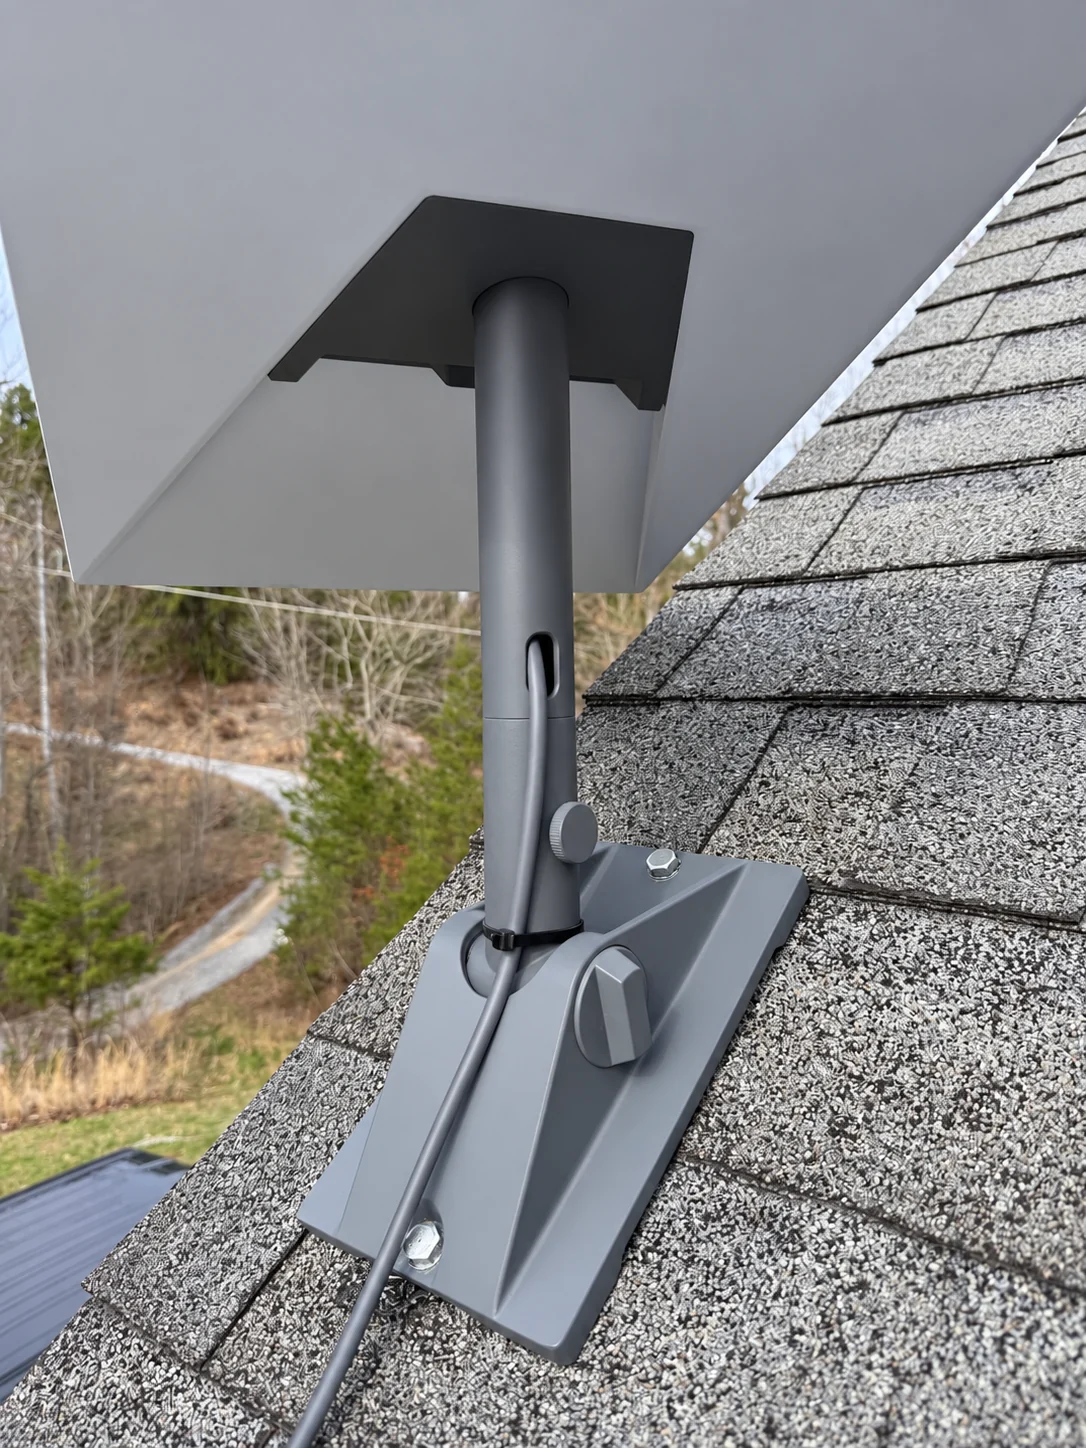
A close view of a pivot mount on shingles. Roof structure, hardware compatibility, and sealing are property-specific decisions.
Installation and photo: Mann's Starlink Contracting · Retouched for presentation · View original field photo ↗Remove and store equipment safely
Disconnect power, release connectors without pulling the cable, protect connector ends, and support the dish during lowering. Do not let it hang by the cable or place weight on the face. Store the router, power supply, terminal, and loose hardware in a dry protected area away from roofing debris.
Need help with this on your Starlink system?
Mann's Starlink Contracting provides owner-installed service throughout Kentucky and an 11-state region.
Repair the roof as a roof system
Old fastener holes and penetrations should be addressed by the roofing professional using methods compatible with the new roof and warranty. Do not reinstall through temporary patches or assume the same holes remain structurally sound. New decking, flashing, shingles, metal panels, or warranty restrictions may change the appropriate mount.
Inspect before reinstalling
Check the terminal, cable jacket, connectors, mount, fasteners, seal components, and interior equipment. Roofing work can crush, cut, bury, stretch, or coat a cable with hot material. Replace damaged components rather than hiding a weak section beneath the new roof.
Treat reinstallation as a fresh placement review
Confirm obstructions, roof layout, safe access, cable route, and future serviceability. Reinstall only after the roofer releases the surface. Then verify alignment, app status, Wi-Fi, and weather sealing, and save photographs of the completed new-roof installation.
Get a personal installation estimate.
Send your location and project details. Caleb will discuss your equipment and mounting needs, then confirm your complete quote before scheduling.
Questions first? Call Caleb directly at 270-940-4866.
Written byCaleb MannOwner and installer at Mann's Starlink Contracting. Caleb works directly with customers from project planning through final system setup.

